Blender MCP Auto-Modeling Tutorial - DesignToolbox AI Desktop
Connect Blender inside the DesignToolbox AI desktop app, and with a single prompt or one reference image you can let Blender auto-model, group and layer automatically — fast mode is free.
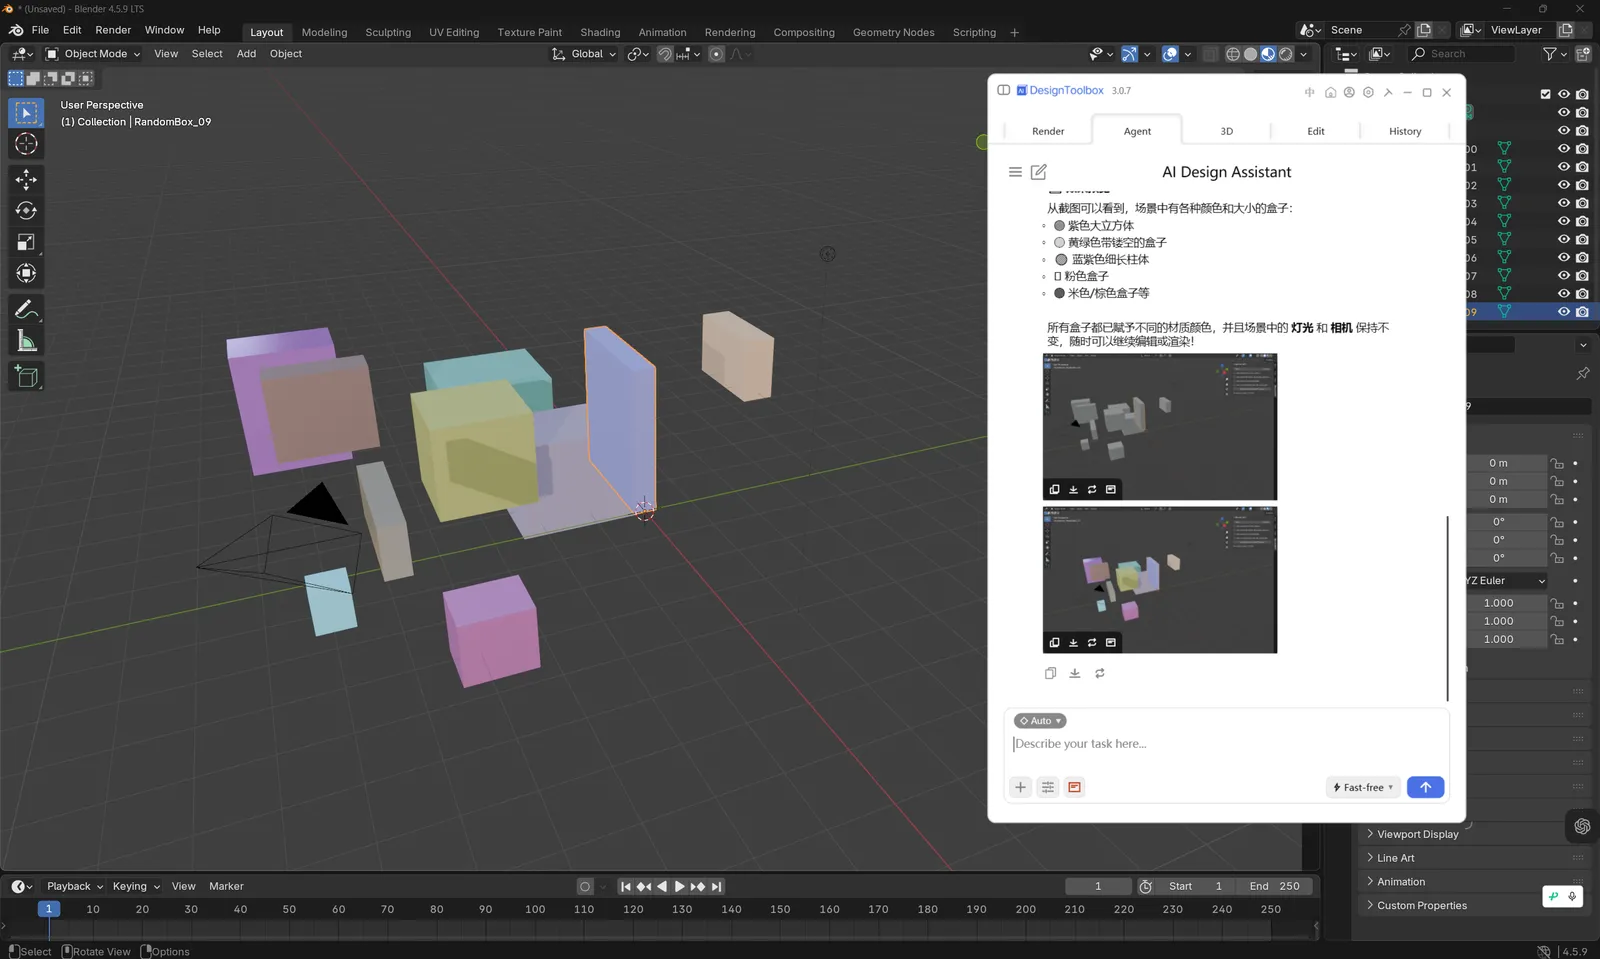
Demo: auto-modeling in Blender through conversation
How do you auto-model in Blender? Just enter a prompt or a reference image and the software models automatically, organizing groups and layers for you — and the main features are free. Below we walk through everything from downloading the desktop app to your first auto-modeling run.
Download the DesignToolbox AI Desktop App
First install the desktop app and register an account.
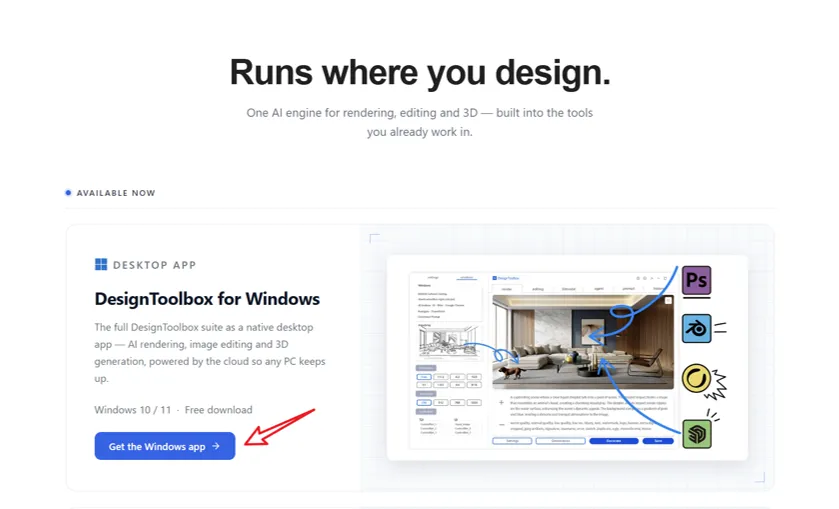
- Open designtoolbox.ai/plugins, find the Windows App entry, open the page and click download (about 240 MB), then double-click to install.
- If the system warns that it is unsafe, you can temporarily turn off Windows protection and then install; the software contains no viruses and is safe to install.
- After installation, open the software and register a new account — email registration is recommended.
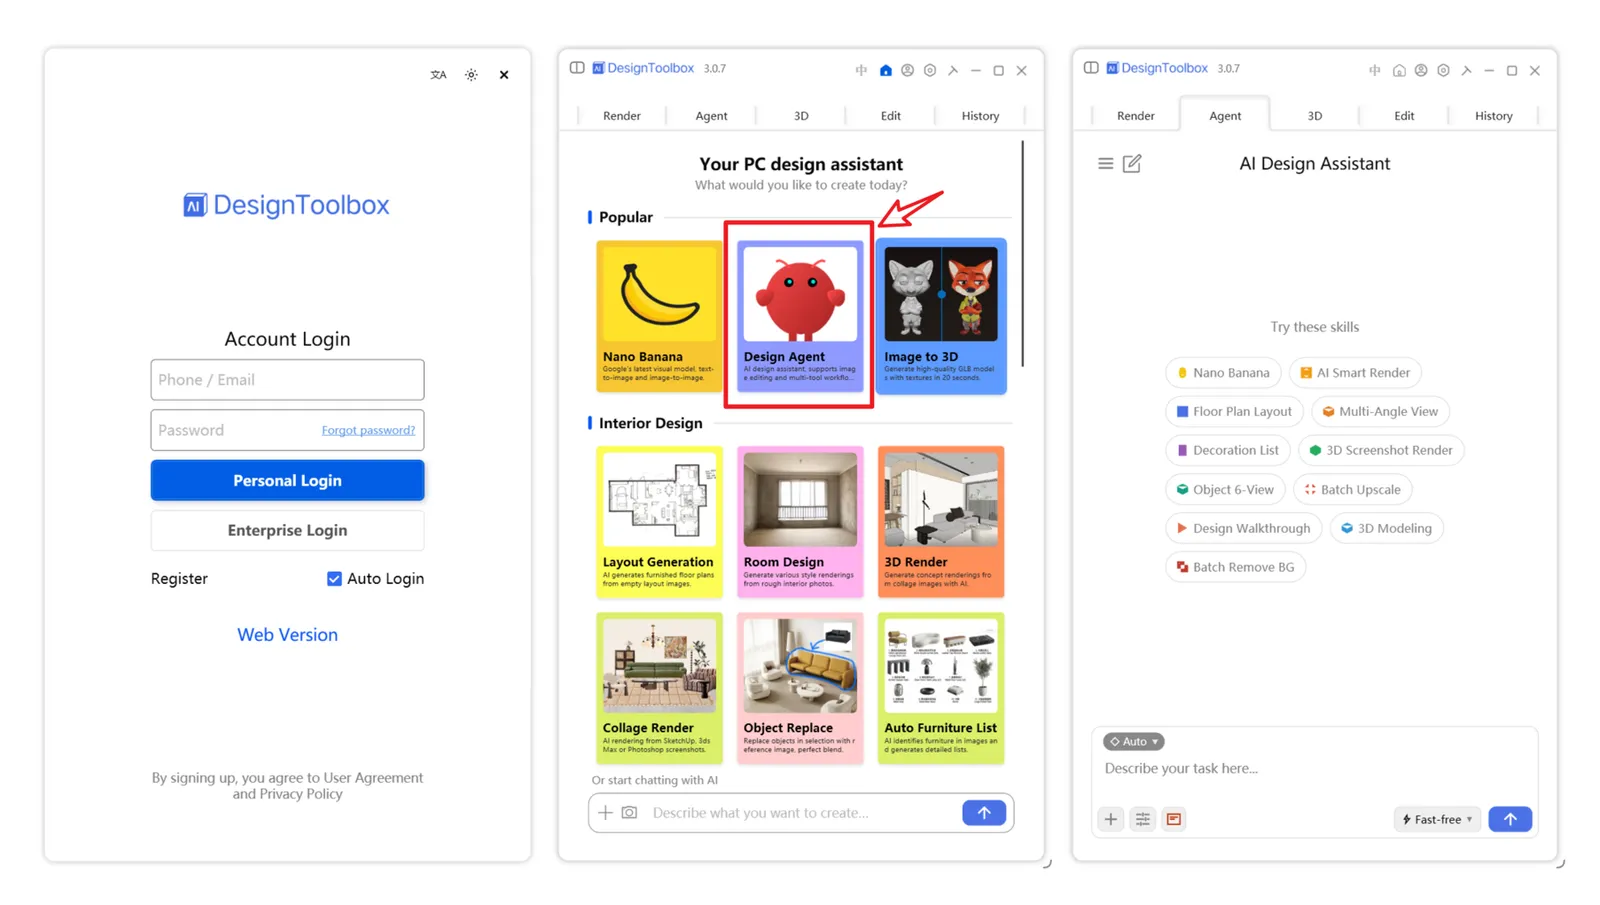
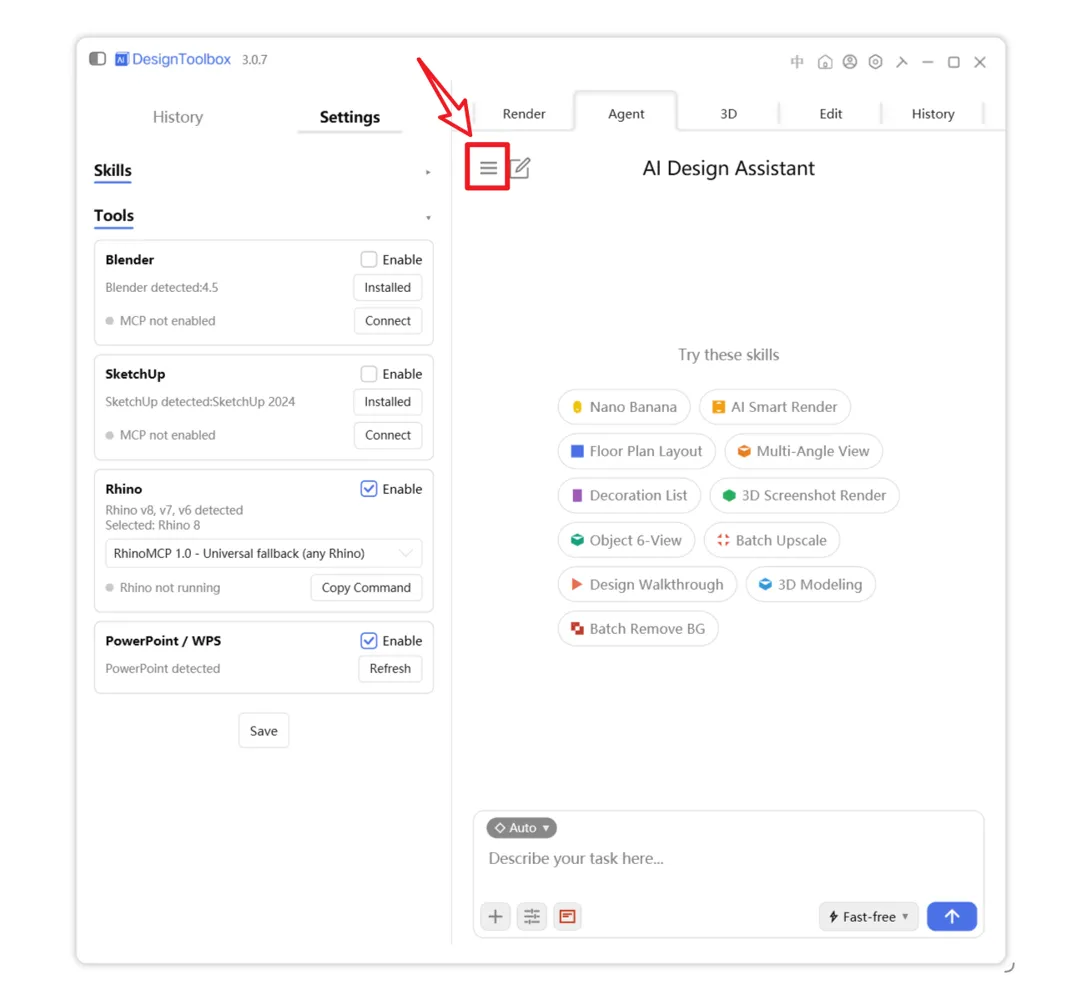
After logging in, find the Design Agent card on the home page. Once inside you get a default chat page; click the hamburger button in the top-left to open the left panel.
Set Up MCP in Blender
Install the Blender MCP add-on and connect it to the desktop app.
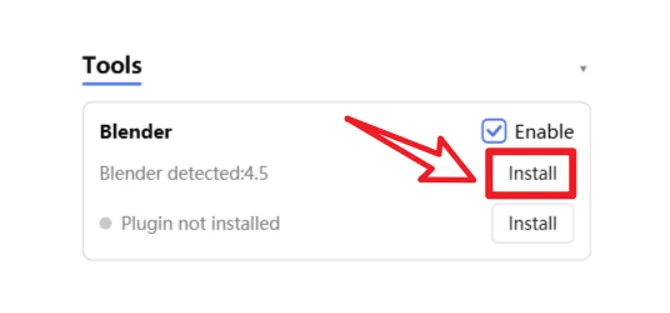
- In the left panel, find the Blender tab and click install.
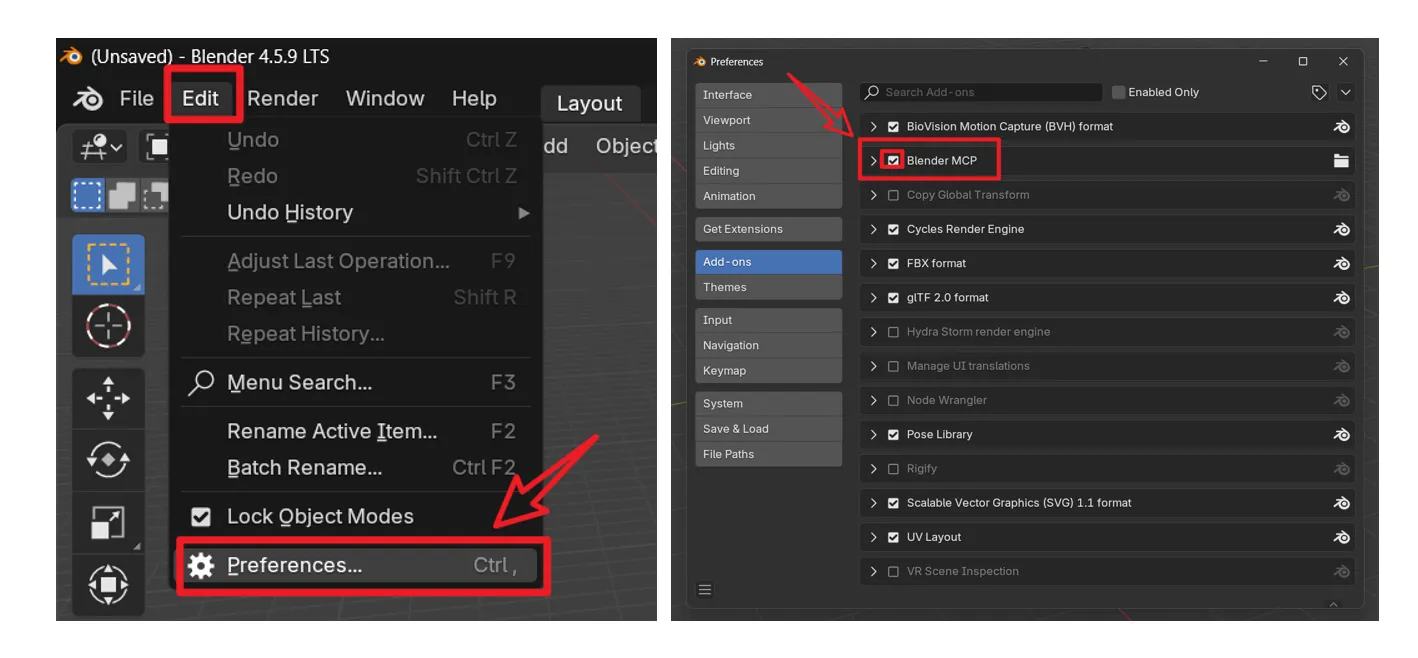
- Open Blender, and under Edit — Preferences find Blender MCP and tick it to enable.
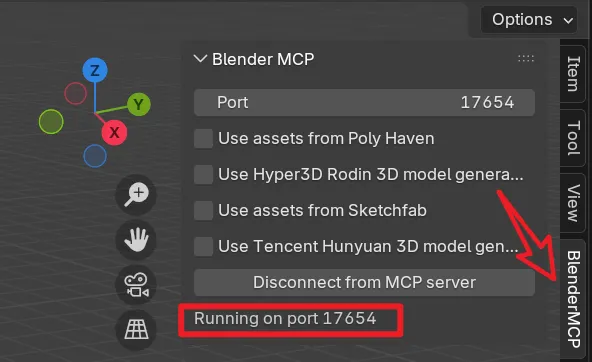
- Back in the Blender main view, press N to open the right-side add-on panel; seeing Running on port 17654 means it is running successfully.
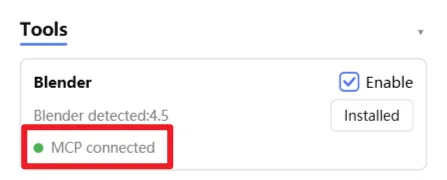
- Now go back to the DesignToolbox desktop app, which will show MCP connected, meaning the connection succeeded.
Start Auto-Modeling in Blender
Once connected, you can model just by chatting in natural language.
Now you can model through conversation. fast mode is free and covers many everyday tasks — for example, ask it to “create 10 random boxes in Blender.”