Rhino MCP Auto-Modeling Tutorial - DesignToolbox AI Desktop
Connect Rhino inside the DesignToolbox AI desktop app and let it auto-model, group and layer from a single prompt or reference image — fast mode is free.
Demo: auto-modeling in Rhino through a chat
How do you auto-model in Rhino? Just type a prompt or drop in a reference image, and the app builds the model for you with groups and layers sorted out — and the core features are free (fast mode). Below we go from downloading the desktop app to establishing the MCP connection for your Rhino version, step by step.
Download the DesignToolbox AI desktop app
First install the desktop app and register an account.
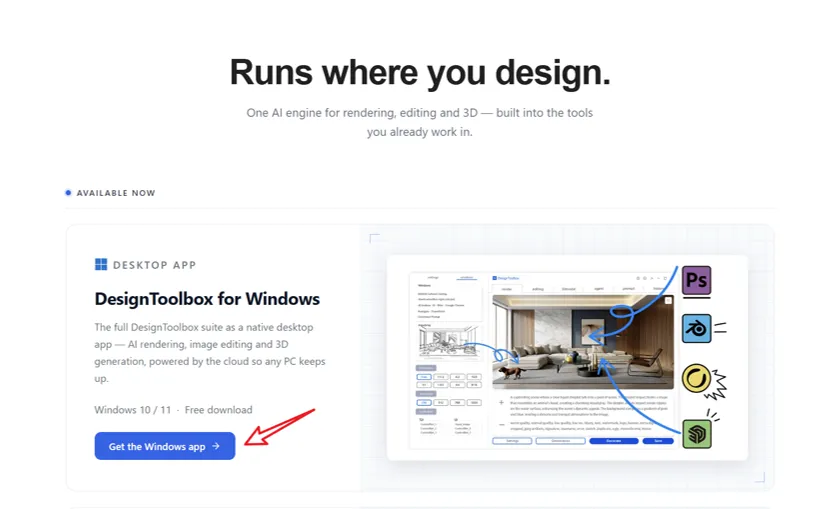
- Open designtoolbox.ai/plugins, find Windows App, open the page and click download (about 240 MB), then double-click to install.
- If the system flags it as unsafe, you can temporarily turn off Windows protection and install; the software contains no virus and is safe to install.
- After installation, open the app and register a new account — email is recommended.
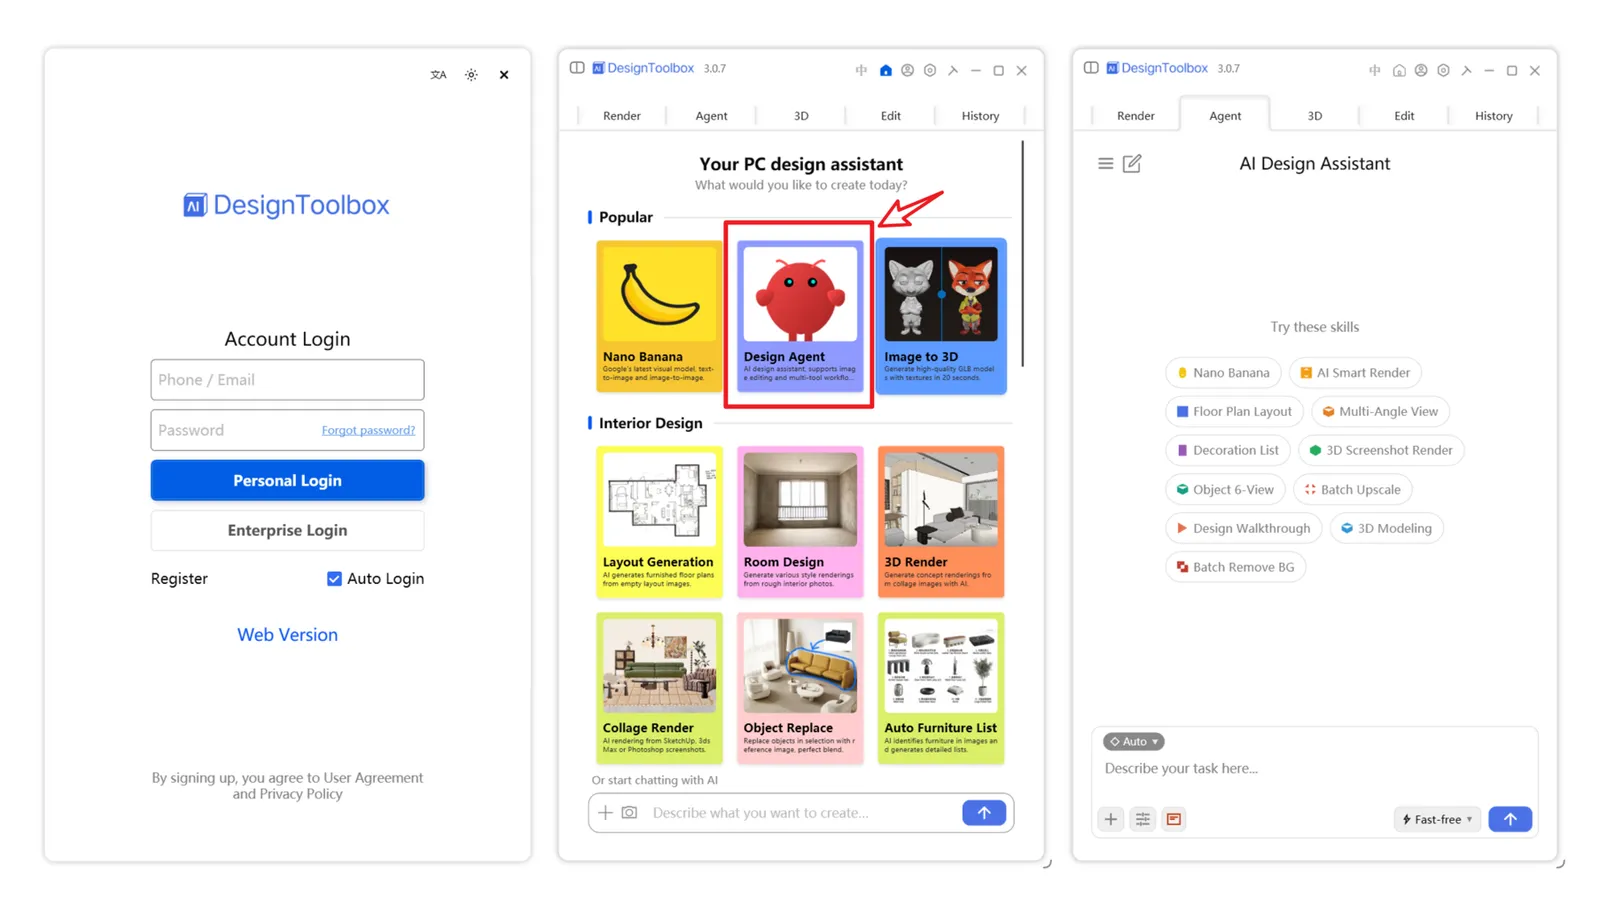
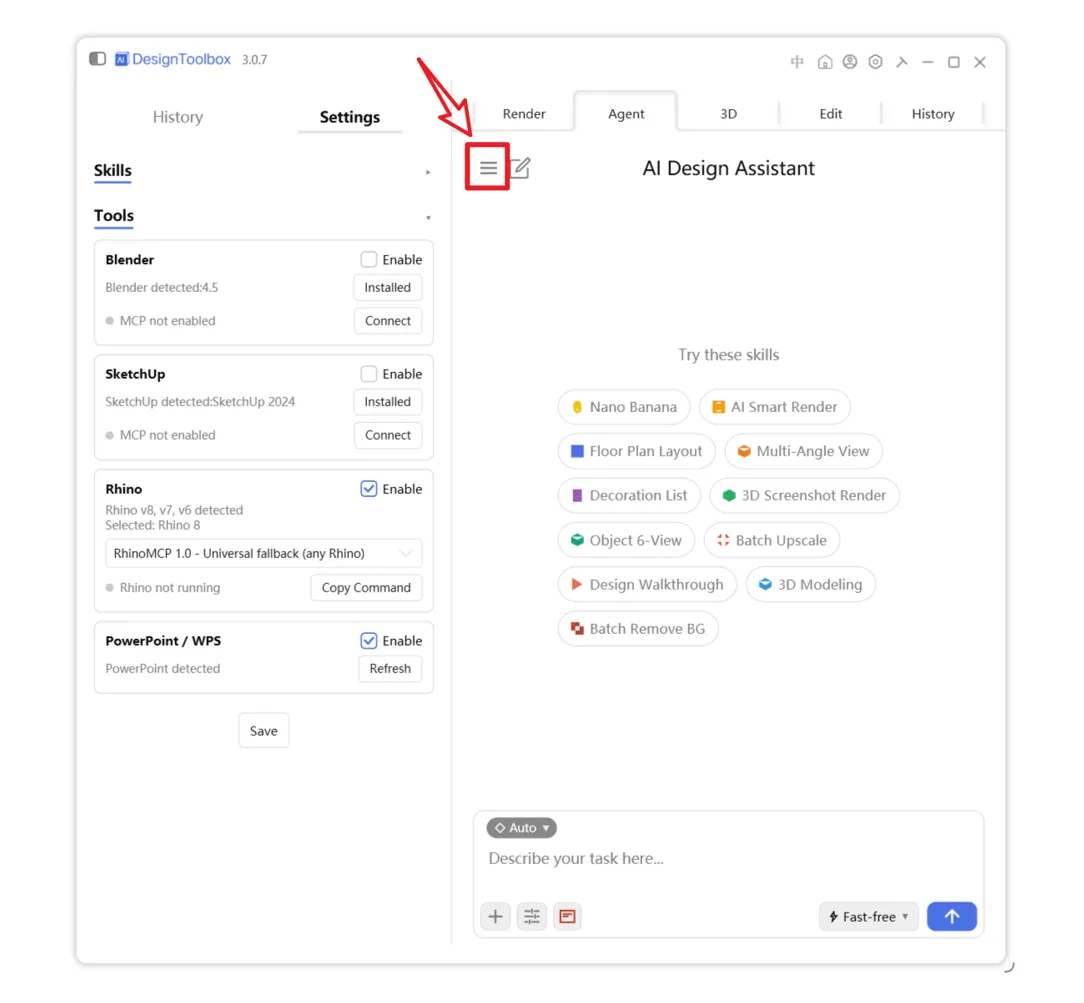
After logging in, find the Design Agent card on the home page; open it to get a default chat page, then click the three-bar button at the top-left to open the left panel.
Connect Rhino (choose the method by version)
The connection method depends on your Rhino version — pick the right one.
Method A: Rhino below 8 SR30 (incl. Rhino 7) — RhinoMCP 1.0
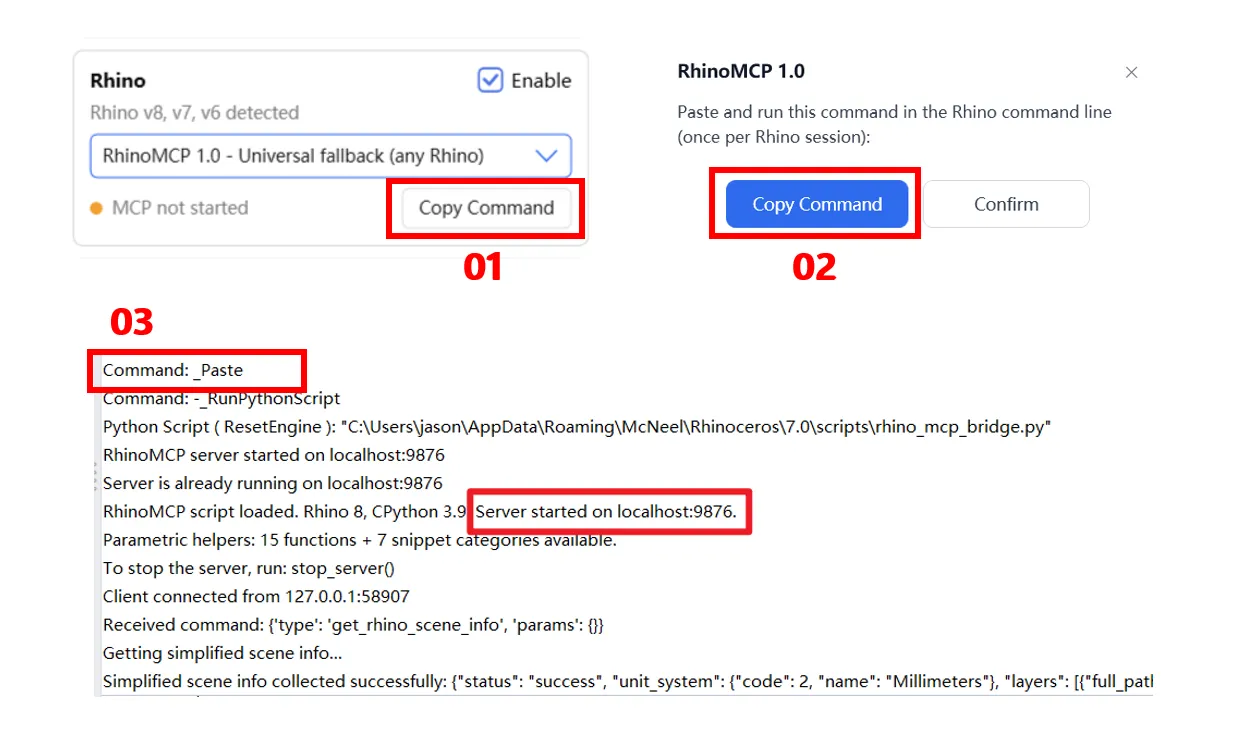
- In the left panel select RhinoMCP 1.0, then click the blue Copy Command button to copy the command.
- Back in Rhino's top command line, right-click Paste the command; it runs automatically and shows
Server started on localhost:9876.
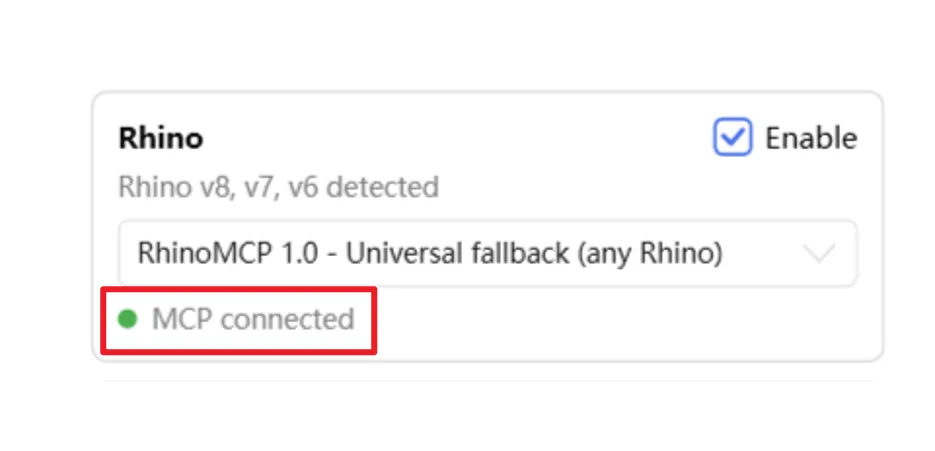
When you see MCP connected, the connection is established and you can start modeling by chat.
Method B: Rhino 8 SR30 and above — RhinoMCP 2.0 (better Grasshopper support)
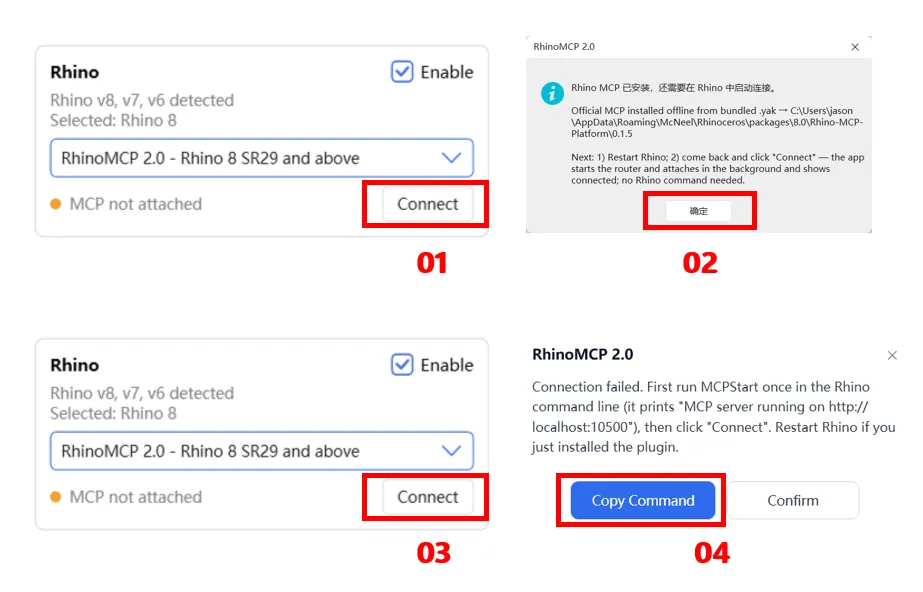
- In the left panel select RhinoMCP 2.0, then click install / connect.
- A dialog pops up — restart Rhino at this point.
- After restarting, click connect again.
- A dialog appears; click Copy Command to copy the command.
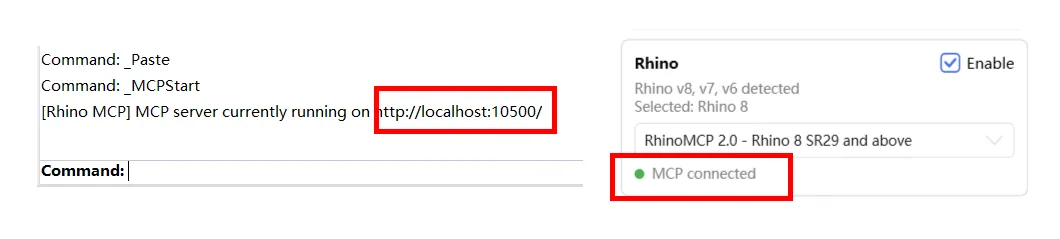
Back in Rhino's command line, right-click Paste the command and press Enter; once you see port 10500, return to the desktop app and click connect — it shows MCP connected when successful.
Start auto-modeling in Rhino
Once connected, just chat in natural language to model.
After a successful connection you can chat directly with the Design Agent to auto-model in Rhino, with groups and layers sorted automatically. Fast mode is free and handles plenty of everyday tasks — see the demo at the top of this page.